Residential Driveway - Trench Drain Install
Most homeowners that purchase trench drain are looking to resolve an existing drainage issue. Driveway drainage problems are the most common, so let’s talk about how to install a trench drain in an existing driveway. The problem can vary from being merely a low spot in the drive that causes the pooling of water to the unfortunate deluge of water that enters the garage each time there is a heavy rain.
Problem
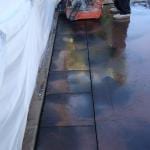
In the below situation, the homeowner was getting water into his garage with every hard rain. Further investigation discovered that water was running through a seam at the asphalt-garage floor interface and draining to the foundation which caused dampness along his basement walls, resulting in an over active sump pump. In addition to having a driveway that gently sloped toward the garage, the house was located at the low end of the street, which made it prone to collecting street run-off. To make matters worse, downspouts drained from the roof on either side of the garage door, supplying more water to the affected areas.

The Plan
To remedy the situation, the customer made the decision to install a trench drain abutting the garage floor to accept drainage from the downspouts. The water was to be discharged toward the back yard, which sloped to a creek. The home owner selected the POLYCAST® 600, a pre-sloped 6″ wide polymer concrete trench drain paired with cast iron grates and steel channel protectors.

Step One – Excavation
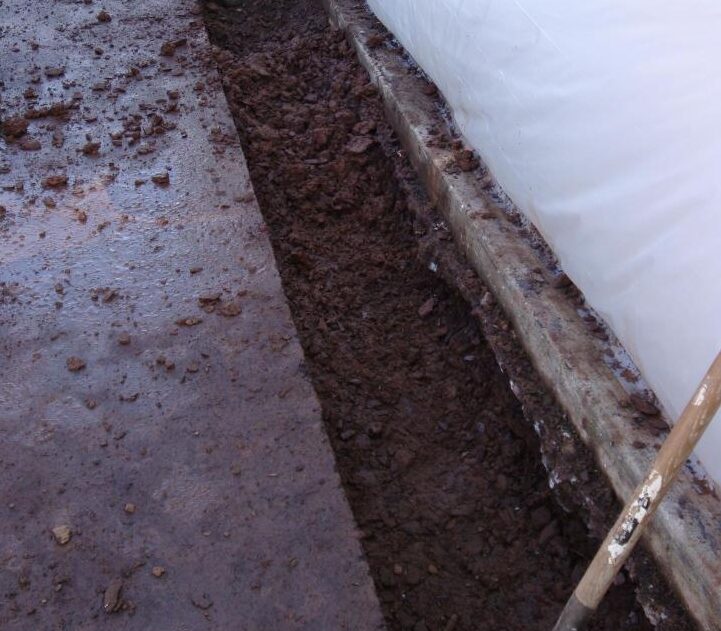
Prior to any work, the contractors hung a sheet of plastic to protect the garage door and siding from slurry and concrete splashes. Using a concrete saw, a line was cut in the asphalt, 20 inches in front of the garage door. Then the asphalt strip was cut into smaller squares for easy handling and removal. The diamond blade on this saw had a 6″ cutting depth, which made it able to cut through the 4 inches of asphalt and another 2 inches of the gravel below.
The installers manually removed both the sectioned asphalt and underlying gravel. During this time, the downspouts were fitted with 4″ PVC fittings which were necessary to divert the roof water into the trench and drainage pipe
Step Two – Assembly
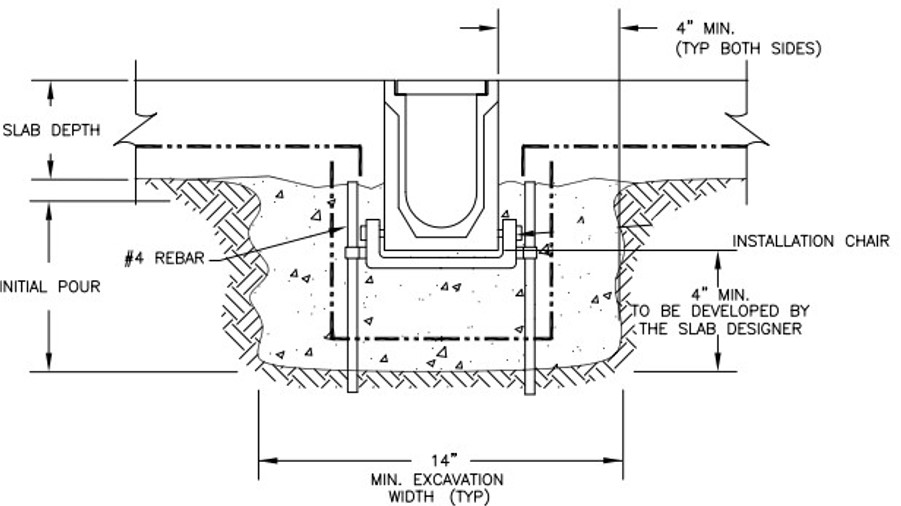
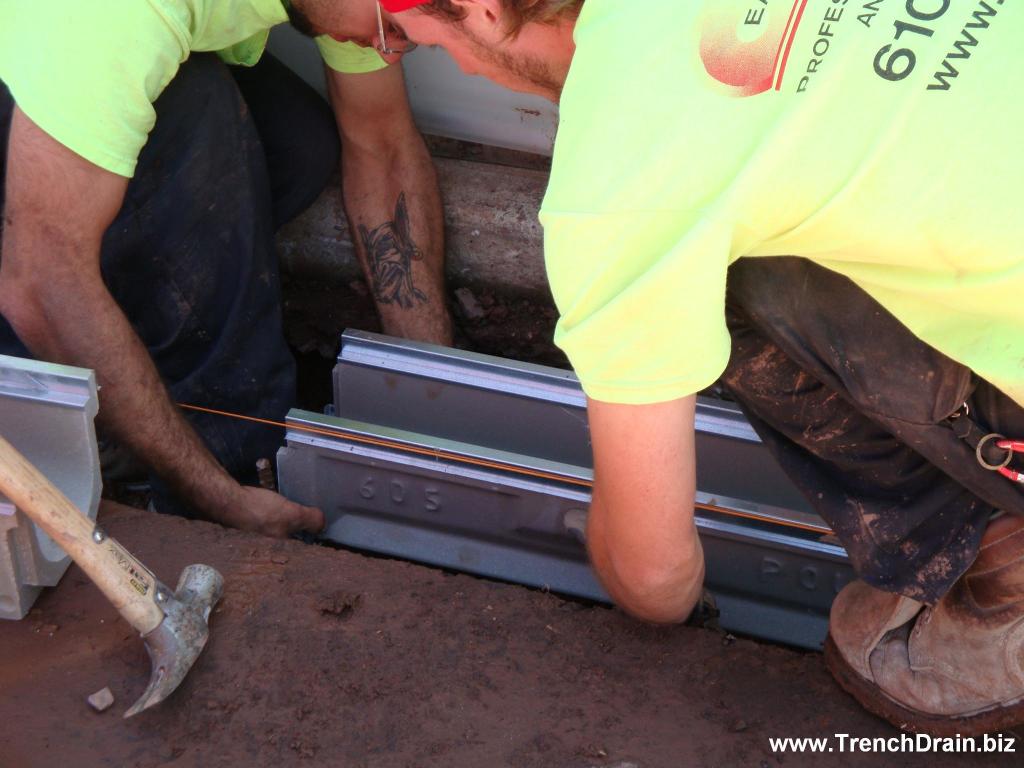
To assemble the channels, placement began at the lowest point (invert out) and progressed to the shallowest end. Contractors established a level line just below the surface of the asphalt and 14″ from the edge of the garage floor. They attached installation hardware to the first 4′ long polymer channel section and set it in place, suspended 4 inches above the excavated surface, with #4 rebar.
The top edge of the channel was adjusted to meet the level line by using installation chairs. Vertical adjustments were done by sliding the installation chair on the rebar, whiles horizontal alignments were made by adjusting the bolts on the installation chair.
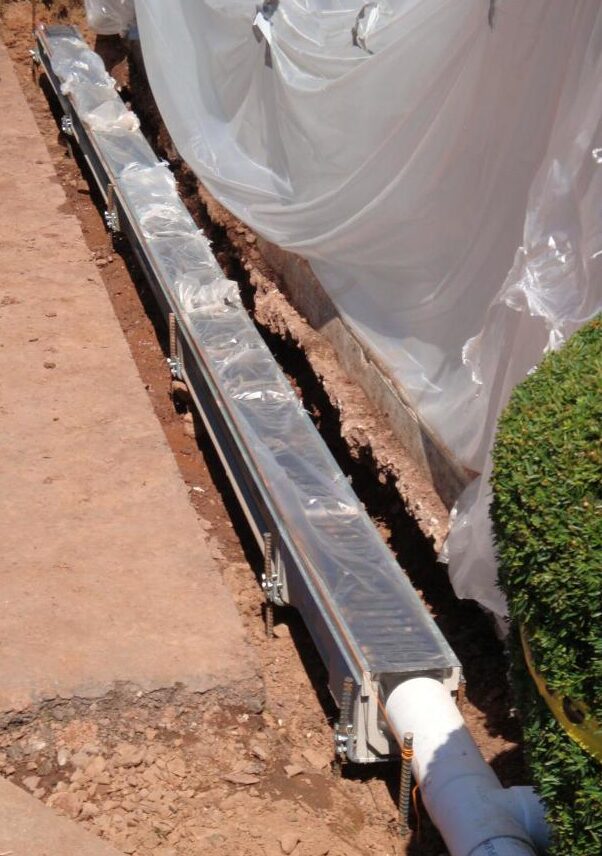
After leveling the first channel, the contractors added installation hardware to the end of the second channel and attached in an “end to end” manner with the first channel. Again, they suspended the channel 4″ above the excavated surface and adjusted laterally and horizontally on the rebar supports to match the level line. The installers repeated the technique until the last channel section was put in place.
Once the channel was assembled, the contractors installed end caps (with knockouts) and attached down spouts with piping. The grates were then wrapped in plastic sheeting, both to protect them and to keep concrete out of the trench. As an alternative to wrapping the grates, using a strip of plywood in the grate recess during concrete pouring allows you to keep the grates clean and the trench free from concrete and not deal with the plastic sheet.
Step Two – Assembly
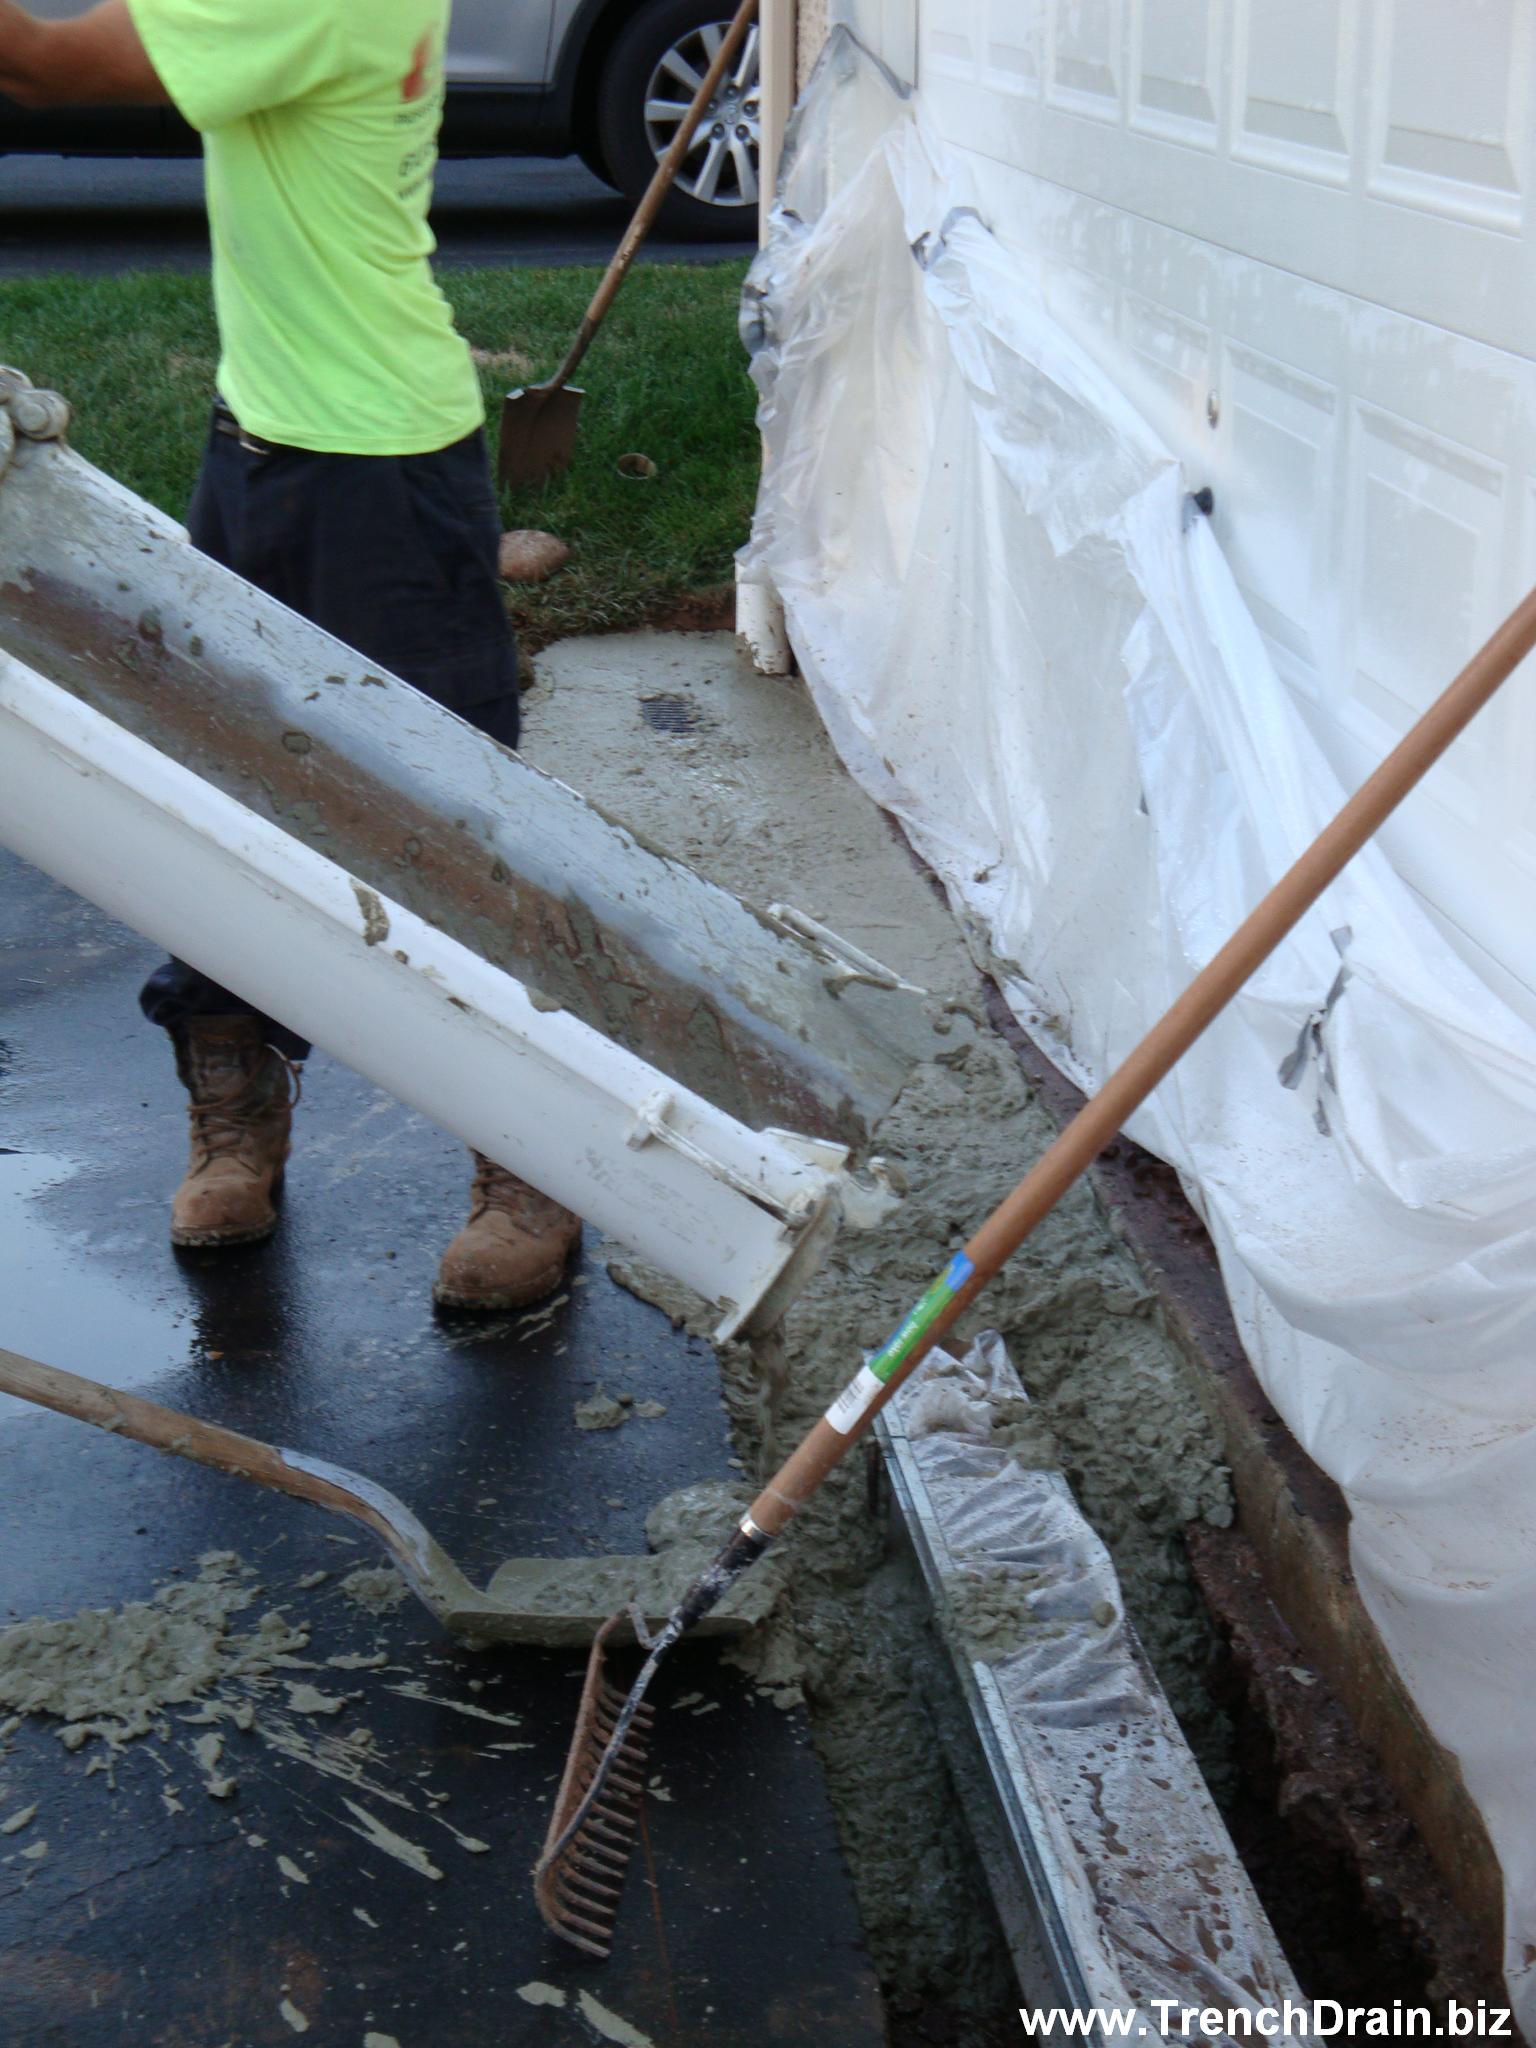
For this installation, the drain was centered in a 20″ wide excavated trench that was approximately 12″ deep. A minimum 4″ space was below the channel and 6″ on either side for concrete to fill. No reinforcing was used in the concrete (4000 psi mix). The concrete truck discharged the mix directly into the trench. Two men placed the concrete in the trench using hand tools and only took about one half hour.
Once the concrete was placed and the truck had left, the installers removed the grates to clean up the channels. They finished the cement with trowels and edging tools. Once finishing was complete and the concrete began to set, they locked the grates into place and tightened the bolts.
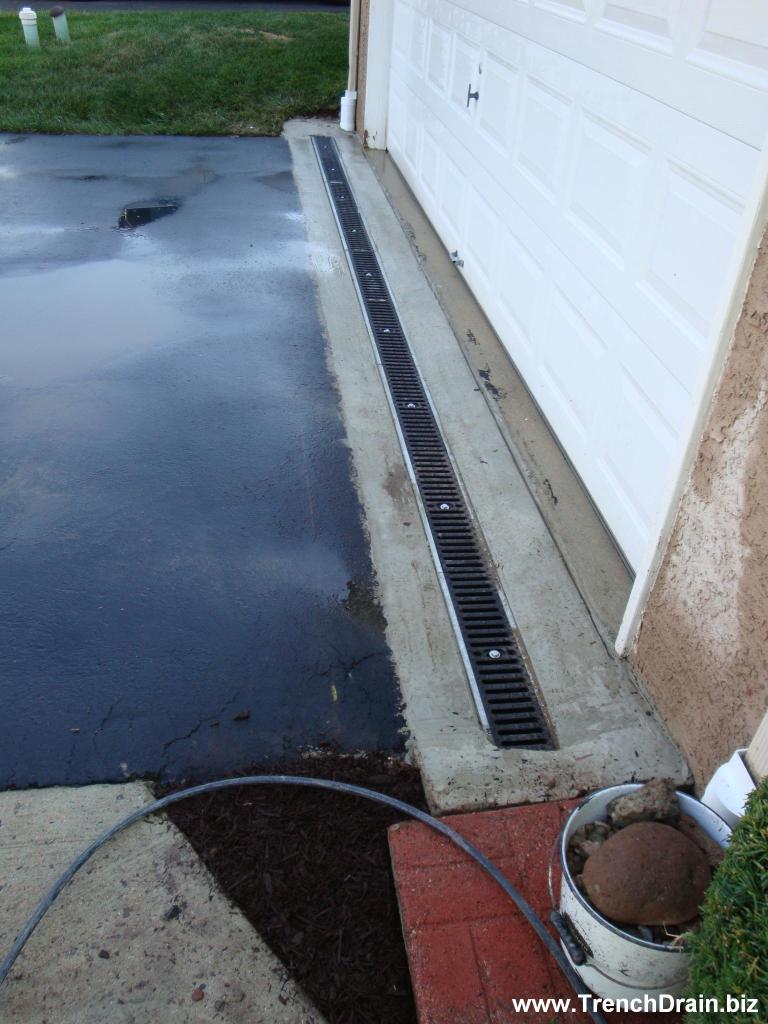
When the concrete finally dried, the contractors cleaned up the surrounding space, replaced dirt areas that were affected by the excavation, returned flower planters to their proper places, picked up rubbish, and power washed the driveway for the homeowner.
Installing a driveway drain resulted in proper redirection of stormwater runoff and eliminated both the water entering the garage and down the basement walls. By taking initiative and using a trench drain system the customer avoided future costly repairs to their infrastructure due to water damage.
Trench Drain Systems is one of the largest distributors in the United States who are committed to providing you with quick solutions to all your surface water runoff problems. Our professional staff can assess your project requirements and quickly offer you competitive pricing and information regarding the products you need. Contact us for a free quote or for further information on drainage solutions visit TrenchDrain.com or DrainageKits.com
Phone: 610-882-3630
Email: Shop@TrenchDrain.com
Click here for a fast and free quote!
Pingback: Trench Drain Blog » Driveway Drainage Problems
Pingback: Residential Downspout Catch Basin Installation | Trench Drain Blog
Water is standing in the bottom of my trench drain. What is the solution?
Pat,
Standing water can be a sign of a couple things. If your driveway gets a lot of yard debris (leaves, sticks, sediment) you may need to clean out the drain’s outlet pipe; you can do this using a pressure washer or a Roto-Rooter type tool. It is also possible that the drain does not have enough slope to direct water into the outlet, but to be sure I’d recommend sending a picture to Sales@TrenchDrain.biz so a technician can take a look at it for you.
I hope this helps!